Best Locations and Compositions
ULURU
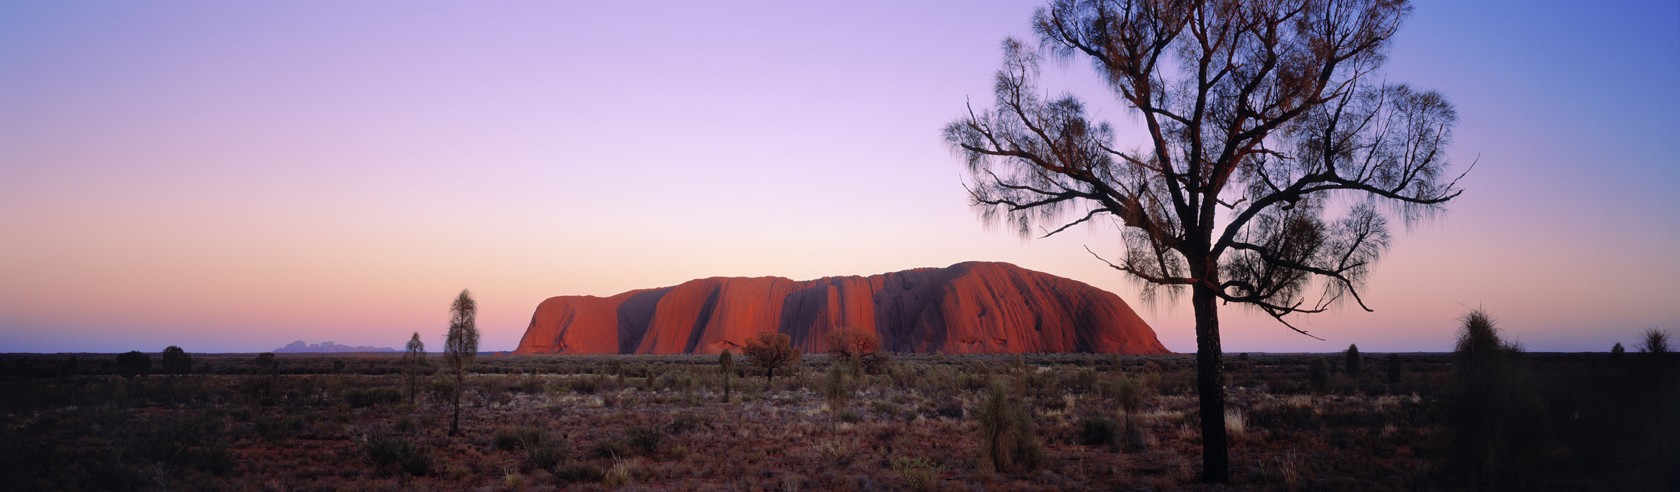
The Sunset Viewing area for cars is the go-to spot to take in sweeping views of the desert plains and a sun-lit Uluru. It’s a deservedly popular location and gets busy; so arrive early to scope out a prime view. The far (southern) end of the car park is a good tip for an unobstructed view, but also be prepared to move around to find foreground interest for your shots – such as gnarled trees, red earth or spindly grasses. If you’re lucky, some mottled clouds or a rising full moon will also provide a striking backdrop to your scene.
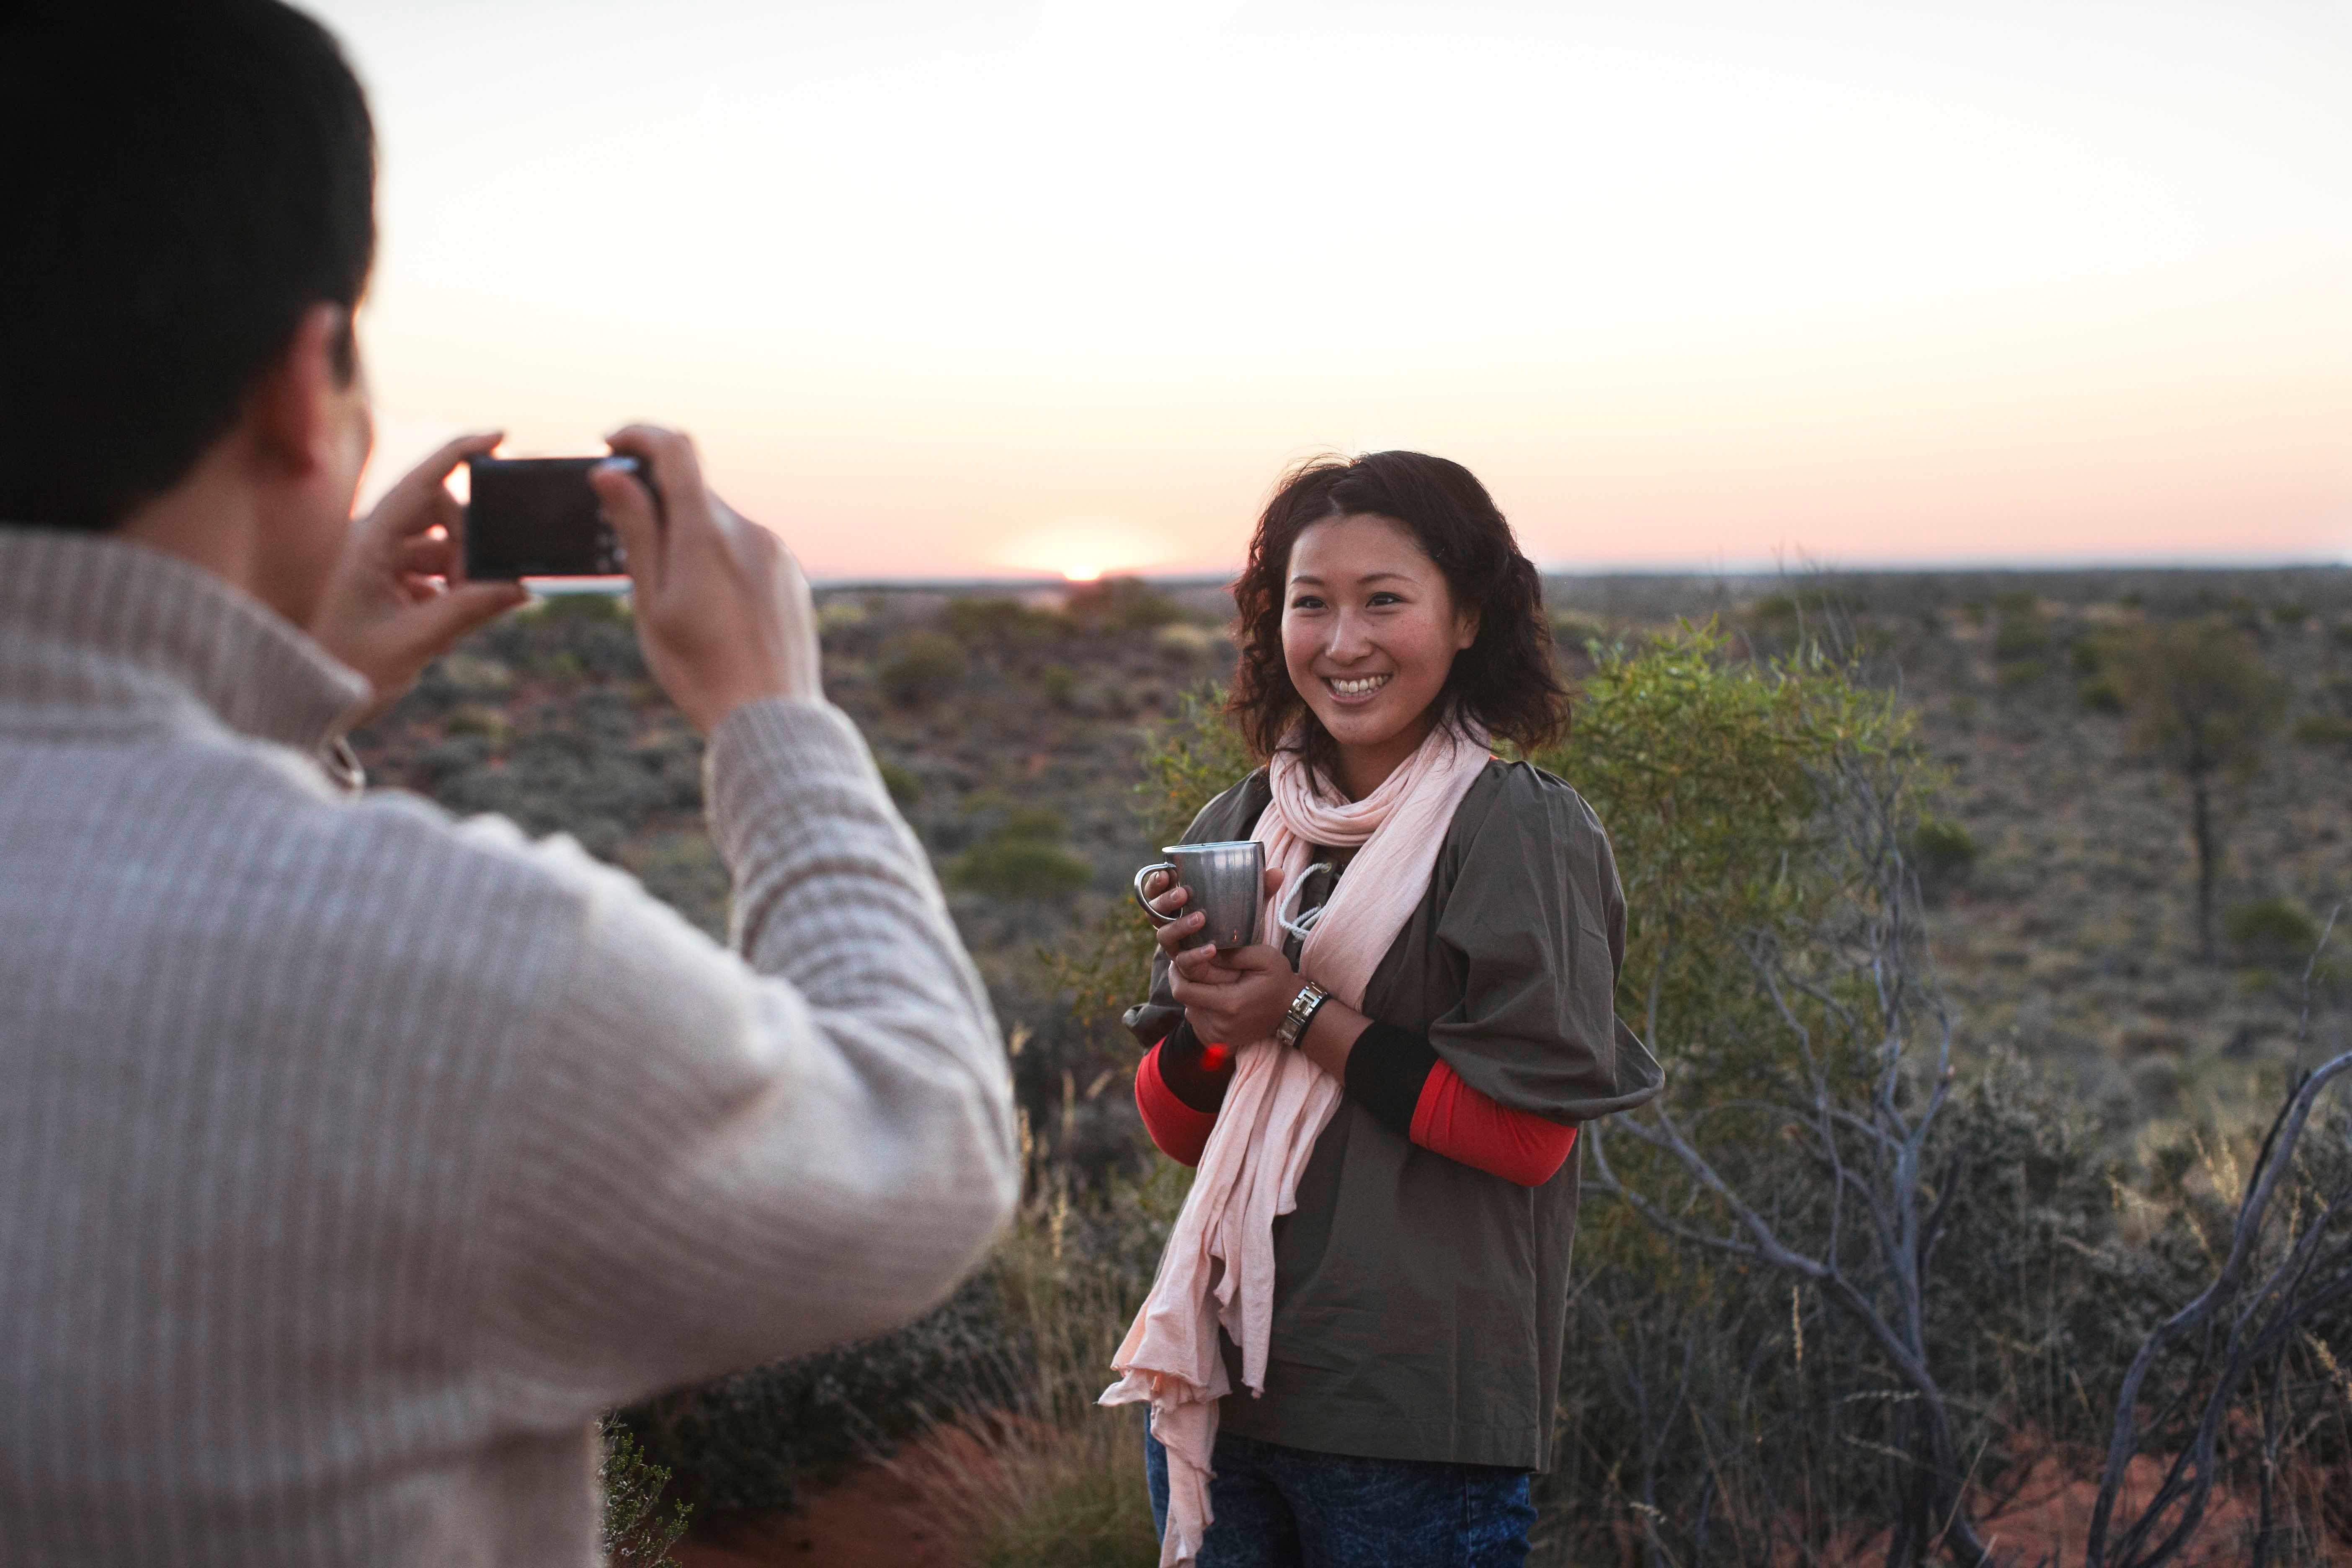
Shoot wide to show Uluru in the flat desert expanse, but also think about zooming in for close-up detail of the rock’s ridges and water-stained grooves. By including other people in the foreground of your shots, you’ll also give viewers a sense of what it’s like to experience an Uluru sunset.
For sunrise, the Talinguru Nyakunytjaku viewing area provides a stunning vista towards the south-east face of Uluru. Here there are looped walking tracks where you can frame the rock between pencil-thin desert oaks. However, for a 360-degree view of the beautiful outback scrub and to capture Uluru and Kata Tjuta in the same shot, head to the dune-top viewing platform. It can get crowded here for sunrise - so again, get here ahead of time for the best views. You’ll find however that just after sunrise, the crowds disperse and you’re likely to have it all to yourself.
Talinguru Nyakunytjaku also works well as an uncrowded sunset spot, with the landscape in golden silhouette before the sun drops behind the rock or dissolves into the horizon.
For more intimate shots, early morning or late afternoon are great times to do the Uluru Base Walk. Here you can get up close to the rock, revealing it’s rugged, rust-like texture. The lush foliage at the base, especially around Kantju Gorge and Mutitjulu Waterhole, provide a dramatic contrast against the red sandstone. Frame your shots to include other walkers to emphasise scale and use pathways or natural features to lead the viewers’ eye into the scene.
KATA TJUTA
Meaning ‘many heads’ in the local Anangu language, the ancient rock formations of Kata Tjuta rise majestically above the green-tinged bushland. From the Dune Viewing area, off the main road to Kata Tjuta, you can take in a wide panorama of the domes (there are 36 in total). Sunrise is particularly scenic here with mulga trees dotting the golden spinifex plains with Uluru silhouetted to the east.
Closer to the domes, the Sunset Viewing spot offers those iconic views of Kata Tjuta’s main domes. Give yourself time to explore the pathways to find a perspective unobstructed by the tallest of the shrubs. Like Uluru, the transformation of light and colour happens quickly here either side of sunset, so work quickly to capture a few different compositions. Stay to watch the twilight colours evolve but keep in mind the park’s closing time and the half hour drive back to the park’s entrance. This location is also a great option for a sunrise silhouette of the rock formations.
At Walpa Gorge, a trail leads you along a natural creek bed between Kata Tjuta’s two tallest domes. The sheer, rugged walls here provide a captivating backdrop to the foliage flourishing along their base. If there’s water in the creek when you visit, get down low to capture reflections of the gorge in the natural pools.
A Bird's Eye View
For a whole different perspective on Uluru and the outback landscape, take to the skies with a scenic helicopter or plane flight. If your budget allows, choose the option that includes both Uluru and Kata Tjuta and try for either a sunrise or sunset flight. The scene of first light hitting Uluru, combined with the textures and shadows created in the desert landscape is truly magical. If you’re doing the helicopter option and don’t mind the rush of cold air (especially on freezing winter mornings), also ask about the possibility of a doors-off flight for the clearest views.
An issue you may have when shooting from the air is ensuring you have a fast enough shutter speed to achieve sharp images. Generally you’ll want an exposure of 1/800 sec or quicker. Shooting at sunrise and sunset will also mean you have to increase the ISO to around 1600 to 3200 and shoot with a large aperture (say f4 or f5.6) to achieve these fast shutter speeds. In brighter conditions you can take your ISO down to 800 or 400.
Outback Night Sky
If you’ve ever wanted to get that iconic shot of the Milky Way over Uluru, then mid-winter offers the ideal opportunity. During this time, the stars come out shortly after nightfall and importantly, before the park’s closing time – normally 7.30pm at this time of year.
Try to time your visit so that it coincides with a rising moon that’s 10 – 40% full. This added moonlight assists in illuminating the landscape, whilst not overpowering the stars in the night sky. Set up at the Sunset Viewing spot with a tripod and your widest lens. Work with ISO settings around 3200, an aperture of f2.8 and an exposure between 5 to 10 secs. If there’s no moon, then bump your ISO a little higher and go for a longer exposure.
If you visit any other time outside of summer, you can also capture the Milky Way from outside the National Park – normally, from the dune top lookout near Ayers Rock Resort.
A Unique View
Finally, if you’re wanting to create your own, unique take on Uluru and Kata Tjuta – something beyond the classic view – here’s are a couple of tips for getting creative:
- Always look to add depth and contrast to your images using some foreground interest: flowering plants, tall grasses, weathered rocks, etc.
- Photograph the experience as much as the landscape, by including other travellers in your shots for scale and for that human element.
- Make the most of your lenses and/or zoom: shoot wide for an expansive view and zoom in tight to bring out detail and texture.
- Go against the 'done-thing' and shoot sunrise from the sunset spot and vice versa to capture the sights backlit.
- Change your height: get low to the ground to emphasise the red earth or grasses; or alternatively, go aerial for an overhead view.
- Vary your composition for the horizon: allow plenty of sky to show vastness or have minimal sky to emphasise the desert environment.
- Find unusual perspectives: perhaps take a ride on a camel train with Uluru beyond; or frame the domes of Kata Tjuta through a car window.
- Always shoot at varying times of day and from different viewpoints to take in the changing moods and tones of Uluru and Kata Tjuta.
About Andrew Watson
Andrew is a commercial and travel photographer based in Cairns, North Queensland. Andrew has a passion for showcasing the natural beauty of his home region, as well as the iconic and remote locations of Australia. His imagery is a colourful, diverse mix of landscapes, underwater scenes, native wildlife and aerial perspectives.
You can follow Andrew on Instagram: @andrewwatsonphoto or via his website: www.andrewwatson.com.au